As I’ve mentioned about a million times, I do my best to bake something special for all of the birthdays at my office.
This month, we had a particularly special birthday – the [total foodie] co-owner’s 50th – and I really wanted to try to hit one out of the park for her big day!
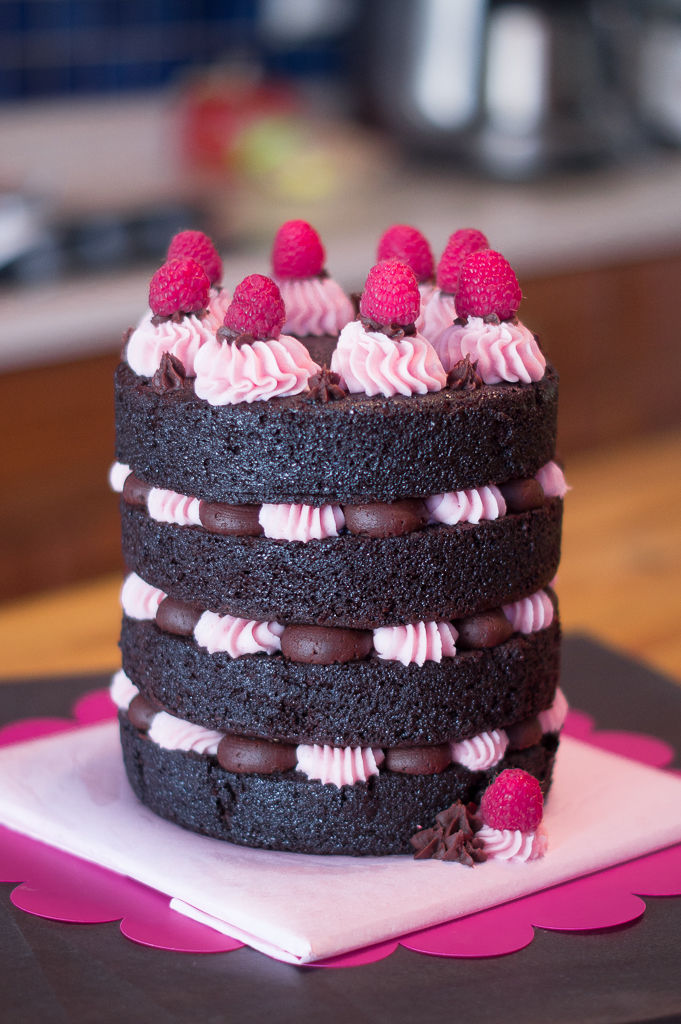
This cake was SO fun to make, but also a little stressful – there’s nothing like trying to make something that will look great, taste amazing, travel well, AND impress your boss. 😉
I knew I wanted to make something that looked on-trend, so when I came across this beautiful cake from Rosie’s Dessert Spot, I instantly knew I had found my inspiration piece. My methodology differed slightly from hers, but the end result is quite similar.
I had a total blast doing the piping – there was something almost meditative about creating the symmetrical layers. Don’t get me wrong – I love creating somewhat haphazard floral cakes – but in this case, piping the consistent pattern was intensely satisfying.
To keep the cake from drying out, I first brushed the cake with a sugar syrup (50:50 water sugar ratio) to lock in the moisture. Then, to create the pattern, I used a large star tip (Ateco #869) and a large round tip (Ateco #809) to pipe large dollops at the edge, and drug them toward the center (pictured below.) Unlike the video above, I did not spread any icing on the layer, and instead relied on the decorative piping to fill the center.
So, enough about how this cake looks, right? How does it taste? Well, what do you think of truffle cake iced with alternating stripes of chocolate and raspberry buttercream?
As classic as this combo is, it actually took me awhile to get there. I knew I wanted to do a great chocolate cake, but I really didn’t want to just pair it with chocolate frosting and call it a day. Eventually I came to the idea to do raspberry, but raspberry what? Finally, I remembered back to my grandmother’s birthday cake with the jam filling, and we were in business! The cake is incredibly chocoately, rich, and dense, which is the perfect pairing to the raspberry frosting that is, while incredibly sweet, somehow lighter feeling than the chocolate cake. If I’m being honest, the icing is really just basic frosting with some jam, so if you were feeling adventurous, you could totally try other flavors. Chocolate cake with orange marmalade? Almond cake with blueberry preserves? Angel food with strawberry jam? I could go on forever. So many amazing combinations!
Suffice to say, I’m absolutely in love with this cake. It looks cute, tastes amazing, and received plenty of oohs and aahs at the office. If I had it to do over again there’s only one thing I’d change – someone stop me one tier earlier! No one needs to drive in rush hour traffic with a cake that’s 14 inches tall!!
- 3 cups all purpose flour
- 1 1/2 cup cocoa powder
- 3 cups granulated sugar
- 1 1/2 tsp baking soda
- 1 1/2 tsp baking powder
- 1 1/2 tsp salt
- 3 eggs large
- 1 Tbsp vanilla extract
- 1 1/2 cups sour cream
- 3/4 cup oil
- 1 1/2 tsp vinegar
- 1 cup hot water
- 1 cup salted butter softened
- 3/4 cup seedless raspberry jam
- 2 cups powdered sugar
- Fresh raspberries embellishment, optional
- 2/3 cup salted butter softened
- 1/3 cup cocoa powder
- 4 cups powdered sugar
- 1 Tbsp vanilla extract
- 4 Tbsp half and half milk, or cream
- 1 cup granulated sugar
- 1 cup water
-
Grease two 6-inch pans and line with parchment. Preheat oven to 350. In a large bowl, combine dry ingredients and whisk together, then add wet ingredients and mix with a wooden spoon until smooth. Divide evenly between the pans and bake until a tester comes out clean, 30-40 minutes.
-
Combine all ingredients in the bowl of an electric mixer and beat on high speed until fluffy.
-
Combine all ingredients except milk in the bowl of an electric mixer and beat on high speed until fluffy. Add milk until the frosting reaches your desired consistency.
-
Combine water and sugar in a saucepan. Boil until the sugar is dissolved. Let cool, then brush over the cake.
-
Allow cake to cool completely. Torte layers if desired. Brush the cakes with the Stay-Moist syrup. Pipe the icing in an alternating pattern using a star tip and round tip.
Icing recipe adapted from Grandbaby Cakes. Stay-moist syrup from Hello Cuppies. Cake recipe adapted from Country Living Magazine.

That’s looks so delicious and yummy and gonna make one tomorrow