This cake was so much fun!
Every year, I bake a cake for my nephew’s birthday. He’s turning five this year, so he’s actually having two parties – one for family, and one for his friends. Usually my sister-in-law and I will tackle baking the cake together, but since we needed to cakes, I handled the one for family, and she did took care of the one for his friends.
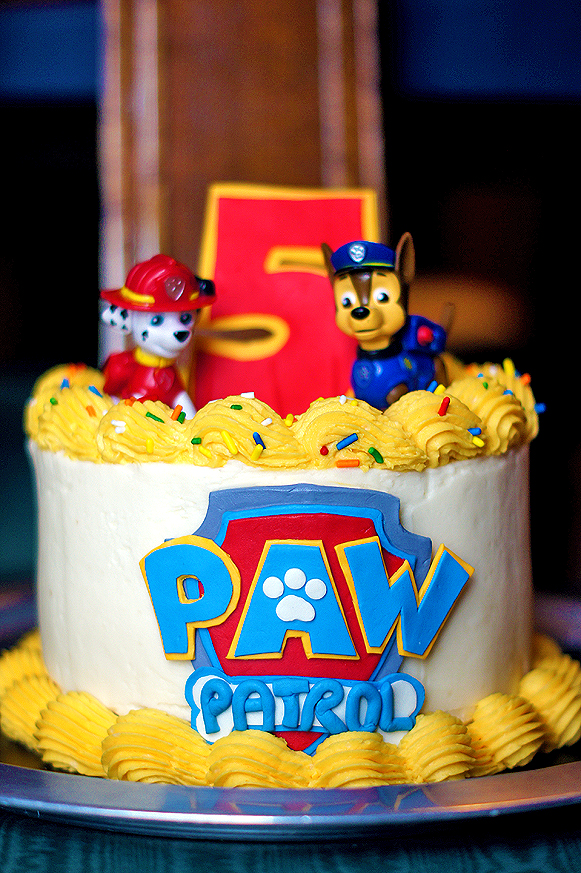
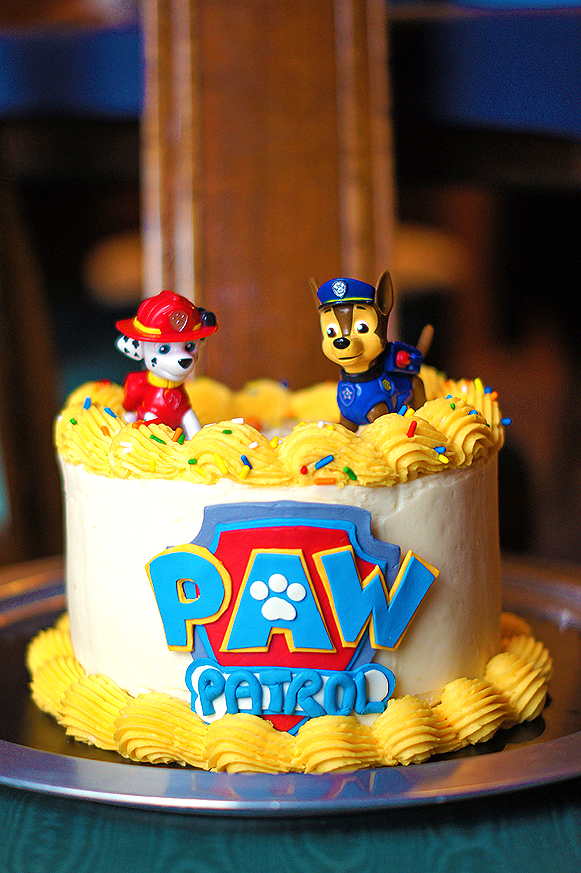
This year’s theme was Paw Patrol, and just like last year, he requested Funfetti cake with lemon icing! Killer combo! 🙂
Since it was a family-only party, I decided to go with a 6″ round cake pans, which made just the right amount of cake for a smaller party. I also kept it relatively simple – I knew that while he would be thrilled with an elaborate fondant display, using toys that he could keep would be way more exciting in the long run.
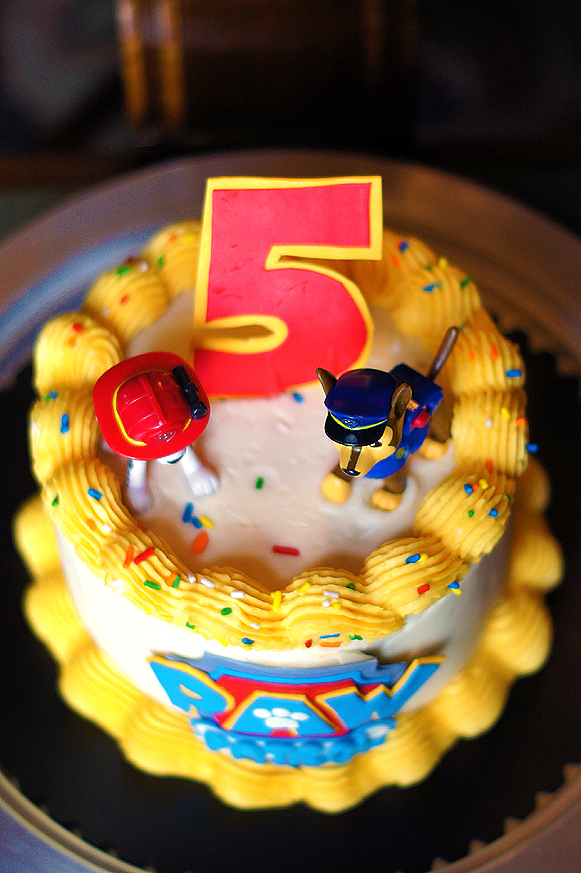
That’s not to say I didn’t spend hours on fondant work! The Paw Patrol logo was cut in several layers based on a logo drawing grabbed from a drawing site. To minimize the amount of cutting and printing I’d need to do, I worked from the outside in, and managed to only print the full logo twice. On one copy, I cut out the outer shield shape, then the inner shield. On the other print-out, I cut out the PAW letters and the bone shape. I found that the best method was to roll the fondant thin using a pasta machine, lay it flat on a cutting board, and use an exacto knife to cut out the shape. Once cut, I placed each layer on the side of a fondant bucket so that it was slightly rounded when it dried. I followed the same process for the number 5 on the top of the cake, except I let it dry flat. For pieces that were layered on top of each other (each color of the shield, letters, paw print, etc.) I used a very small amount of vodka as glue.
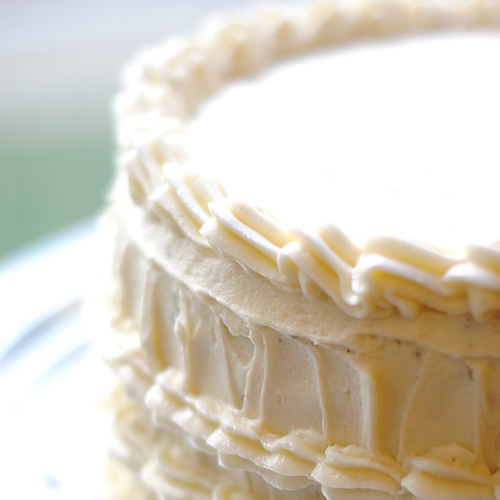
Once the fondant work was done I whipped up the icing and covered the cake, then tinted the remaining icing a sunny yellow for the border. The logo was attached with icing, and the number five was held up with wooden skewers. To finish it all off I added a few Paw Patrol toys and sprinkled some colorful sprinkles along the piped border. Easy peasy!
- 1 and 2/3 cup ultragrain flour
- 1/2 teaspoon baking powder
- 1/4 teaspoon baking soda
- 1/2 teaspoon salt
- 1/2 cup unsalted butter melted
- 3/4 cup granulated sugar
- 1/4 cup light brown sugar packed
- 1 large egg
- 1/4 cup sour cream
- 3/4 cup milk
- 1 tablespoon vanilla extract
- 1/2 cup sprinkles
- 1 1/2 c salted butter
- 1 dash salt
- 1 1/2 tbsp lemon juice
- 1 tsp lemon extract
- 2 lb powdered sugar
- 2 tbsp milk of your choice
-
Preheat oven to 350. Line the bottoms of two 6"x3" round pans with parchment paper, then grease bottom and sides. Set aside. Combine dry ingredients and set aside. Melt butter, then whisk together with sugars. Add egg, sour cream, milk, and vanilla and mix until combined. Slowly add dry ingredients and mix until no lumps remain. Add sprinkles, stir gently, being careful not to overmix. Pour evenly into prepared pans. Bake for 25-30 minutes or until cakes test done with a toothpick. Cool completely.
-
Using a stand mixer with paddle attachment, mix together butter, salt, lemon juice, and extract until well blended. Gradually add powdered sugar one cup at a time and whip vigorously. Gradually add milk until desired texture is reached.


how do you make the paw patrol sign?
Hi Jennifer,
The way I made it was I printed out two copies of the logo from a drawing site, then used them to as a template to cut each layer out of thinly rolled fondant using an xacto knife. I worked from the outside in, so first I rolled out the gray for the badge shape, and traced around that. Then I rolled out the blue for the line around the inside of the badge, and cut the pattern down to that layer and traced around it, and repeated that for the red. Then, using the second printout, I traced around the letters and bones using the same method as described above.
I did find cookie cutters on Etsy that looked like they would be simple to use, so if you have time, that might be a good bet.
<3 Leesha
What tip did you use for the piping on the cake? Thanks!
Hi Morgan,
I used an Ateco 869, but any large open star tip would work. A Wilton 8B may be easier to find.
Hope that helps!
<3 Leesha
Hi. What kind of icing is your cake? Buttercream?
Hi Nessa,
Everything except the paw patrol logo and the figures are the buttercream recipe listed! 🙂
Thanks,
Leesha
Did you freeze the cakes before frosting them or just let them cool off completely?
Just let them cool completely so the frosting doesn’t melt! 🙂
Am like this am going to try it thanks
Thank you so much for sharing this fabulous looking cake. I’m going to attempt it later this week for my niece’s birthday. I’ve never worked with fondant before and have a few questions. Do you let each layer of the logo dry on its own first and then attach them all together with icing when it’s time to put them on the cake? Also, how far in advance could you make the pieces of the logo? I’m going to make the cake itself on Friday night but am worried it’s going to take forever to make the logo (being my first time and all) and was thinking maybe I should do that Wednesday.
Also, I don’t have a fondant dryer. What would you suggest I instead? Would a mixing bowl work?
Any other advice for a newbie would be very helpful! Thank you!
So excited you’re going to try this – you’ll do great!
Between each layer I used vodka (any spirit should work) as a glue, and then let them dry together as one big piece. If you don’t keep alcohol around you can make a ‘glue’ by heating fondant in the microwave and mixing it with water. I don’t do this myself so I don’t have a go-to recipe, but you should be able to find one online. When I do this for gumpaste I just kind of wing the ratio. 🙂
As long as your fondant is fresh you should be able to make decorations well in advance, and Wednesday should be just fine. The only thing to worry about is that as the fondant starts to dry it becomes less pliable, so you’ll want to make sure you let it dry on a curved surface, otherwise it won’t sit flat on the side of your cake. Also, if you’re refrigerating your cake, don’t put on the fondant decorations until after you take it out of the fridge the day you’re going to serve it.
For drying the fondant for the side of your cake, any cylinder that’s close in size to your cake should work OK – a large can, an oatmeal container, even the cake pans you’re using.
Good luck! Please let me know how it goes!
<3 Leesha